
No one looks forward to a cold shower or heating water on the stove to wash dishes. And you can avoid these old-time experiences by investing just a small amount of time and effort in proper care of your home’s water heater. If you own a conventional water heater with a holding tank, the process is very simple DIY project. And can be completed with just a few basic items.
Before Grabbing Your Tool Belt
Before you grab any tools, take a few minutes to think about your water heaters performance. Is the water just as warm and inviting as it has always been? Or has the temperature fluctuated to be hotter or cooler than you once remember? Any temperature changes could indicate the onset of an issue with the thermostat or the water heater’s heating element.
Next, look at the outside of your water heater for any signs of corrosion or water leaks. Also, inspect the water lines and the floor. On the floor, look for any puddles or even signs of water drips that are dried up. Check pipe joints for corrosion. Any cracks or corrosion on the outside of the tank or any other type of damage to the tank or piping is an indication that you need to call (301) 278-8786 immediately for an inspection from a A Better Plumber licensed plumber.
One More Visual Check On Gas Water Heaters
If your water heater uses gas to heat the water, you want to take a look at the burner flame. It should be mostly blue and not yellow or orange. If it is burning more orange or yellow, the heating element is not functioning correctly. It should be replaced to save you some money on your utility bill and avoid a water heater failure.
Getting Down To Work
The first item to check is the pressure relief valve. This valve ensures that the tank will never explode due to excessive pressure. The valve is designed to bleed out excess pressure and then close again. You can manually open the valve and then ensure that it reseals. Be sure that nothing is near the valve opening when testing it, as the water that escapes will be hot.
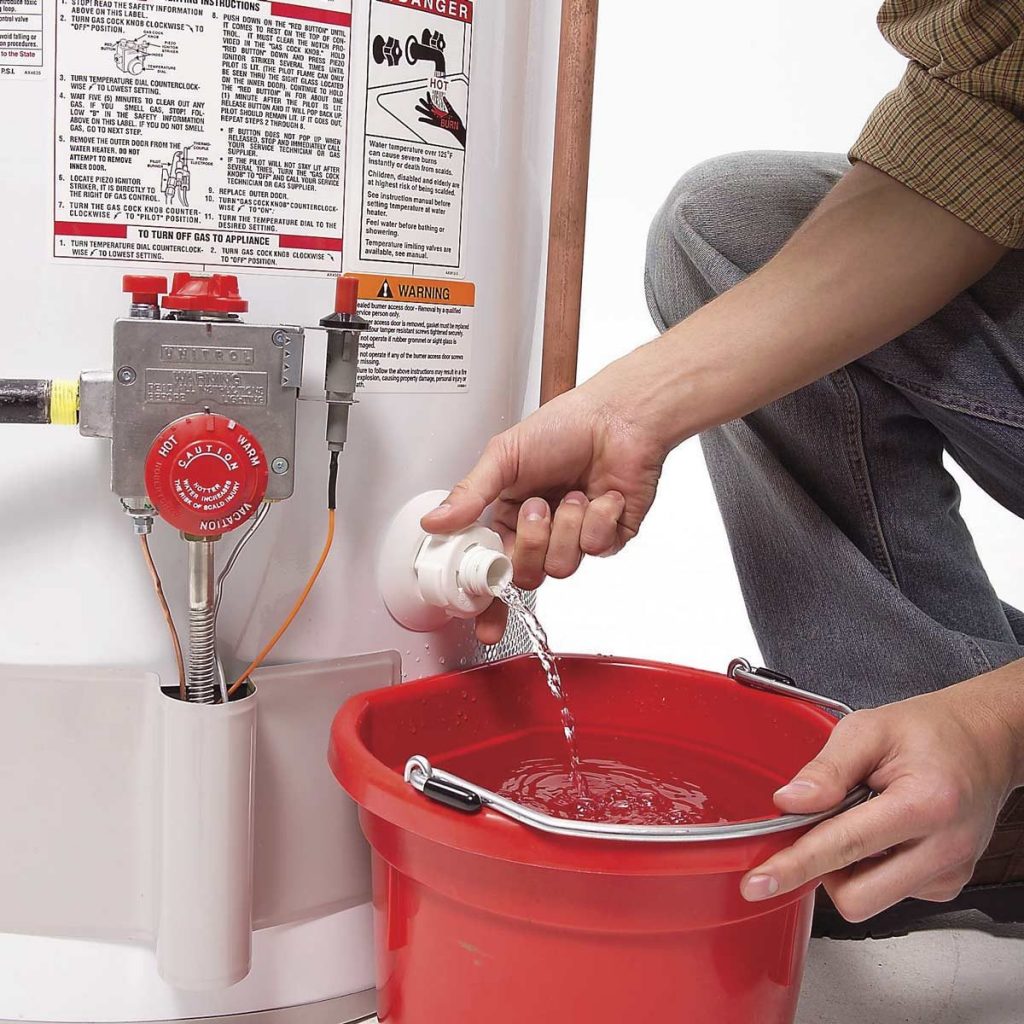
Next, it is time to flush the tank to remove sediment and decrease the potential for corrosion. Start by turning off the breaker for the water heater and the unit’s cold water supply line. Next, attach a hose to the drain valve. Run the hose to a floor drain or outside.
Open the drain valve and the pressure relief valve to allow the tank to drain. When the tank is almost empty, open all the hot water faucets in your home. There should be no water coming from them. Once the water has completely drained from the tank, turn the water supply line back on to flush the tank with clean water. When the water coming from the hose is clear, you know the tank is clean, and you can turn off the water supply line.
Close the drain valve and the pressure relief valve and remove the hose from the drain. Open the water supply line slowly to begin refilling the tank. Turn each hot water faucet off as the water starts to flow steadily. Finally, turn on the breaker for the water heater power to begin heating the water in your clean holding tank.
If you are not comfortable with this maintenance or discover any problems with your water heater, call (301) 278-8786 for assistance from the team at A Better Plumber.